Possible Photoshop Assignments
The objective of this project is to obtain a better understanding of Photoshop Layers by creating the layers of a sandwich on a plate. Utilizing layers effectively is a key skill to have in order to create efficient and fully editable graphics. If layers are not used effectively, it can be detrimental to the success of your project.
You have been hired to create a graphic design for Tom's Diner. The owner wants a BLT sandwich with sides as a graphic for the diner. He has supplied you with an image of a plate from the diner, as well as images of the ingredients for the sandwich. You are to follow the directions given by the project manager to complete the project for the target audience. There is a PDF tutorial located to the right to help you complete this project. However, since this is the first project we will be completing in Photoshop, we will walk through this procedure together as a class. Remember as you look for other items on-line to add to your sandwich to make sure to find high resolution images with a solid color background.
When you are finished, save the file (in .psd format) to your computer in the Photoshop Folder. Make sure to name the file lastname + first initial + sandwich.psd (ex: pettywandwich.psd). This is one of the few times you will not save a JPEG of your work since only the .PSD file will preserve the layers for each component in your sandwich. Submit the .PSD file using the form below. Don't forget to review the rubric to make sure you are meeting all of the project requirements!Sandwich
Working with layers, masks and cropping in PhotoShop.
The objective of this project is to obtain a better understanding of Photoshop Layers by creating the layers of a sandwich on a plate. Utilizing layers effectively is a key skill to have in order to create efficient and fully editable graphics. If layers are not used effectively, it can be detrimental to the success of your project.
You have been hired to create a graphic design for Tom's Diner. The owner wants a BLT sandwich with sides as a graphic for the diner. He has supplied you with an image of a plate from the diner, as well as images of the ingredients for the sandwich. You are to follow the directions given by the project manager to complete the project for the target audience. There is also a PDF tutorial to help you complete this project. However, since this is the first project we will be completing in Photoshop, we will walk through this procedure together as a class.
Graphic Design Beetle Ad
Coloring & Designing.
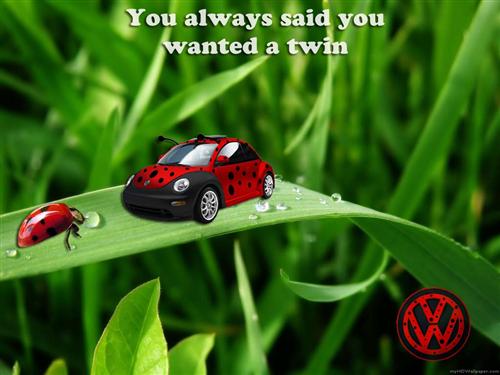
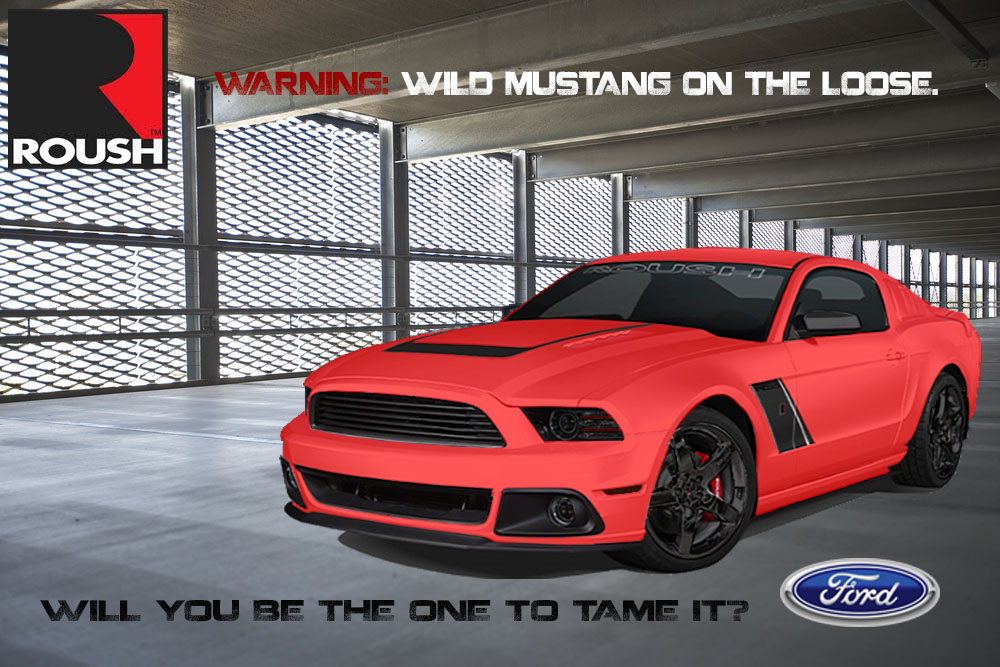
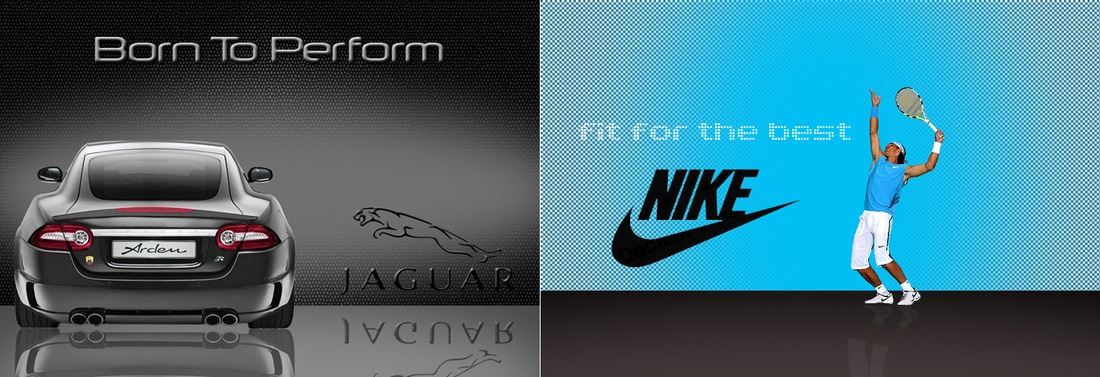
Your job is to personalize a picture of a car with your own colors, logos, and background. Your final product must be a well-developed, attractive advertisement complete with the car's manufacturer logo and unique catchy slogan.
Find pictures of the car you want to make your advertisement for and save them in your Graphics folder. Paint them with any color and design your mind creates, and add logos to the car and/or background to incorporate your personalized style. BE CREATIVE! Take out the white background and place them in a setting of your choosing. Finally, add some text that conveys your unique slogan to finish off your advertisement.
Be sure to arrange your components in a way that utilizes the Elements and Principles of Design and accomplishes your intended purpose. Also, save your file often to avoid losing any of your work. As you may notice, I have provided a final example of what one advertisement may look like - but don't try to copy it! Generate something that shows your skills in Photoshop, as well as your creativeness.
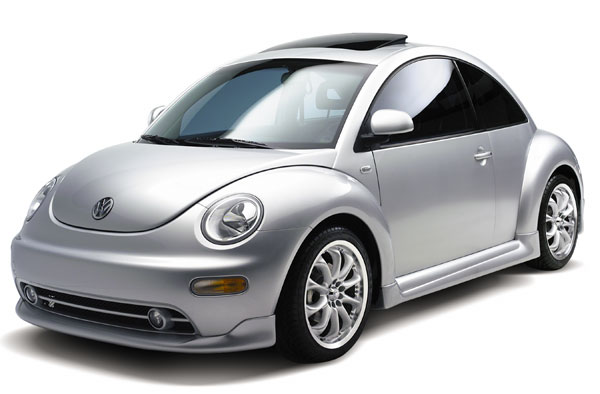
You have been hired as a graphic designer by VW. They want to see what other colors they should offer in the beetle and to see an example of how toadvertise their product. Your final product must be a well-developed, attractive advertisement complete with the car's manufacturer logo and unique catchy slogan. Your background and your car should be the same color. Add a layer style to the text to make it stand out. Come up with an original catch phrase slogan. There is a PDF tutorial located to the right to help you complete this project.
Be sure to arrange your components in a way that utilizes the Elements and Principles of Designand accomplishes your intended purpose. Your finished product will look similar to the example above, but may have a different background, different car color, and different catch phrase. Two-tone the car to challenge your skills and ablities.
As you work, save your project as a .psd and name it lastname + first initial + bettlebug.psd. When you are finished, save it again as a JPEG with the same name (ex: pettywbeetlebug.jpg) Submit the .JPG file using the form below. Don't forget to review the rubric to make sure you are meeting all of the project requirements!
Coloring & Designing.
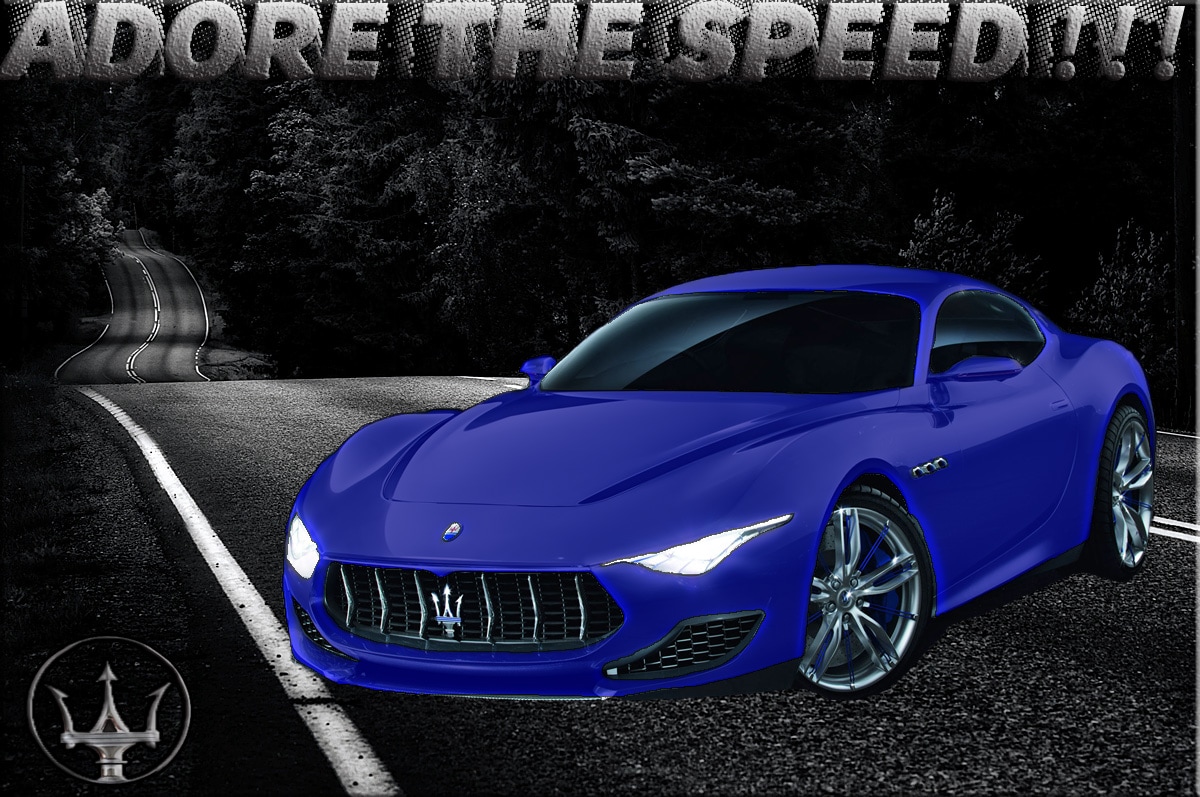
Your job is to personalize a picture of a car with your own colors, logos, and background. Your final product must be a well-developed, attractive advertisement complete with the car's manufacturer logo and unique catchy slogan.
Find pictures of the car you want to make your advertisement for and save them in your Graphics folder. Paint them with any color and design your mind creates, and add logos to the car and/or background to incorporate your personalized style. BE CREATIVE! Take out the white background and place them in a setting of your choosing. Finally, add some text that conveys your unique slogan to finish off your advertisement.
Be sure to arrange your components in a way that utilizes the Elements and Principles of Design and accomplishes your intended purpose. Also, save your file often to avoid losing any of your work. As you may notice, I have provided a final example of what one advertisement may look like - but don't try to copy it! Generate something that shows your skills in Photoshop, as well as your creativeness.
You have been hired as a graphic designer by VW. They want to see what other colors they should offer in the beetle and to see an example of how toadvertise their product. Your final product must be a well-developed, attractive advertisement complete with the car's manufacturer logo and unique catchy slogan. Your background and your car should be the same color. Add a layer style to the text to make it stand out. Come up with an original catch phrase slogan. There is a PDF tutorial located to the right to help you complete this project.
Be sure to arrange your components in a way that utilizes the Elements and Principles of Designand accomplishes your intended purpose. Your finished product will look similar to the example above, but may have a different background, different car color, and different catch phrase. Two-tone the car to challenge your skills and ablities.
As you work, save your project as a .psd and name it lastname + first initial + bettlebug.psd. When you are finished, save it again as a JPEG with the same name (ex: pettywbeetlebug.jpg) Submit the .JPG file using the form below. Don't forget to review the rubric to make sure you are meeting all of the project requirements!
|
|
|
|

|
| backgrounds.zip |
|
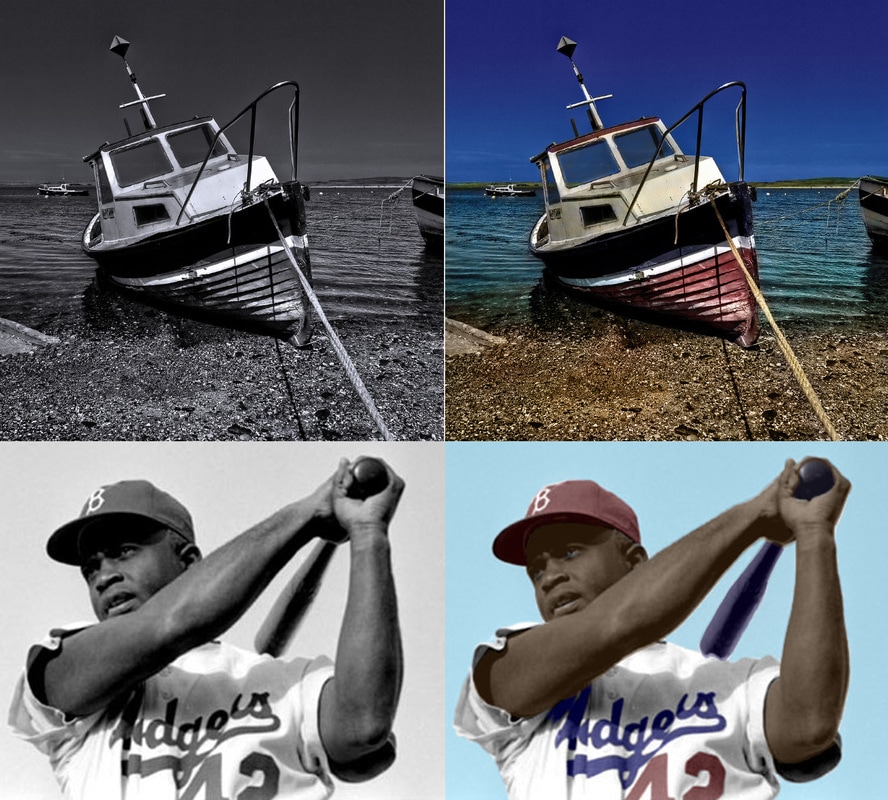
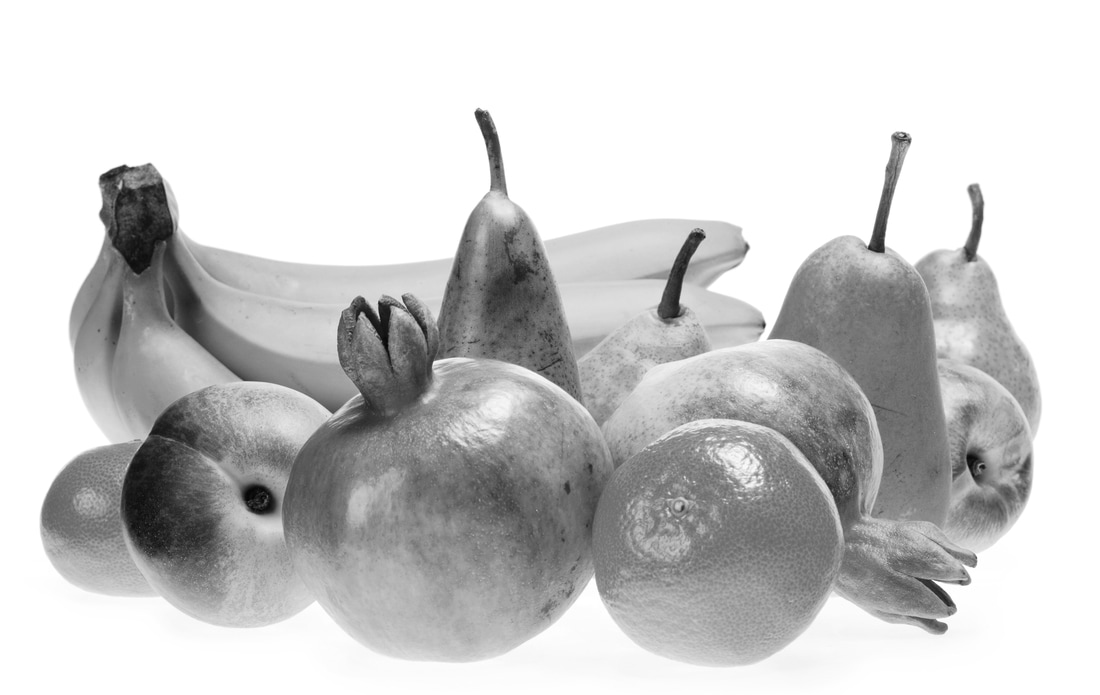
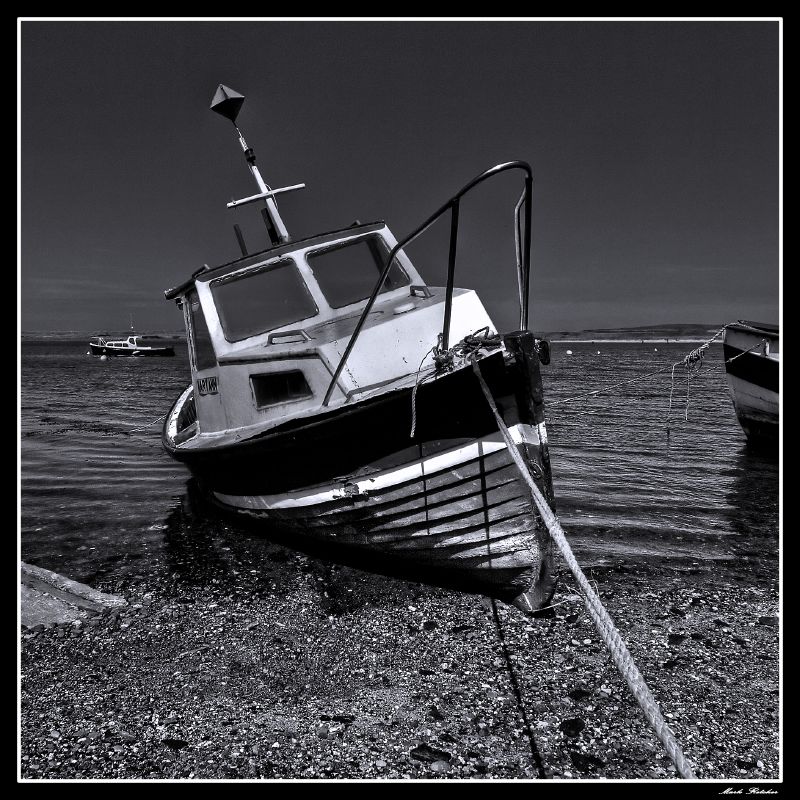
B & W Colorization project
Adding color to a black and white photograph. Adobe Photoshop is a very powerful image editor that can bring life to otherwise dull and unexciting photos. Using the tools and features of the software, a photographer can take his or her pictures to the next level and produce professional-looking images. In this project, you will learn how to use the selection and coloring tools of Photoshop to add a splash of color to a black and white photo. The overall goal is to bring a dull photo back to life by accurately coloring the components to make them seem life-like. Choose a black and white image and use the refined selection tools of Photoshop to carefully select particular areas and add color. Be sure to add each color on its own layer just in case you need to make adjustments later on. Leaving several colors on the same layer (especially the background layer) can result in you having to start your project all over again! |
|
|
|
Magazine Cover ProjectYou have learned some very useful tools and features of Adobe Photoshop by now. Now it's time to apply both your newly learned skills and the knowledge we've been learning in class discussions. In this project, you will apply the Elements and Principles of Design to create an original, attractive magazine cover.
Choose your favorite magazine and create a magazine cover like it in Photoshop. Add a picture or two of the typical cover images this magazine would use - these could be products or famous people. Be sure your images are clean and attractive and not pixelated. The size of the project will be 7.25 width x 10.25 height in inches with 72 resolution. If these were going to be sent to an actual print company then you would use 300 as the resolution. Next, use font sites like dafont.com to select a few appropriate fonts and add headlines to your magazine cover. Be sure to practice unity, balance, emphasis, and proportion!
As you work, save your project as a .psd and name it lastname + first initial +magazine.psd. When you are finished, save it again as a JPEG with the same name (ex: pettywmagazine.jpg) Submit the .JPG file using the form below. Don't forget to review the rubric to make sure you are meeting all of the project requirements!
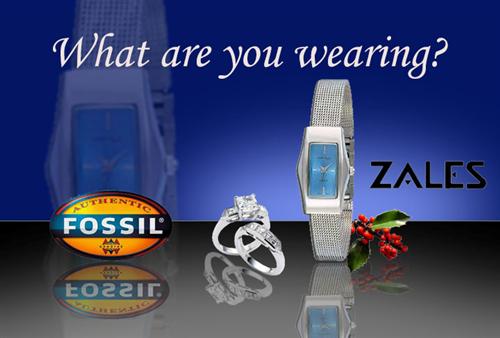
You have been hired by a image editing company that wants you to design an product display for their biggest client. Your job is to take a group of products and showcase them on a stage that reflects their image to make them seem more appealing and attractive.
Create a new Photoshop document that is 720 x 480 pixels. Create a stage and a background for your products. You can create a color background with highlight and add a filter. Place at leastthree different objects on the stage, the manufacturer logo on the wall, and create a reflection on the stage for each item that touches the stage. All of the products must be made by the same manufacturer. Make sure you orient the objects in the most appealing way and make them look good! All objects that are on the stage must reflect. Do not use images that are tilted at an angle. They are more difficult to reflect. There is a PDF tutorial located to the right to help you complete this project.
As you work, save your project as a .psd and name it lastname + first initial + reflect.psd. When you are finished, save it again as a JPEG with the same name (ex: pettywreflect.jpg) Submit the .JPG file using the form below. Don't forget to review the rubric to make sure you are meeting all of the project requirements!
Typography Word Cloud
DM Academy ProjectThe objective of this project is to obtain a better understanding of Font and Typography in design by creating a visual through text. Utilizing font types effectively is an extremely important aspect of digital media.
Choose either The Epic of Gilgamesh or Noah and the Flood. Look carefully through the story that you choose and pull out 50 - 75 words that you think are most powerful and most useful in creating the mood and tone. Download various fonts from dafont.com and use creative placement and layout, as well as various sizes of the words to create a graphic that describes the tone of the story through words. The image can use words to form a main word or a symbolic shape. Use a different font for each word.
As you work, save your project as a .psd and name it lastname + first initial + type.psd. When you are finished, save it again as a JPEG with the same name (ex: pettywtype.jpg) Submit the .JPG file using the form on the right.
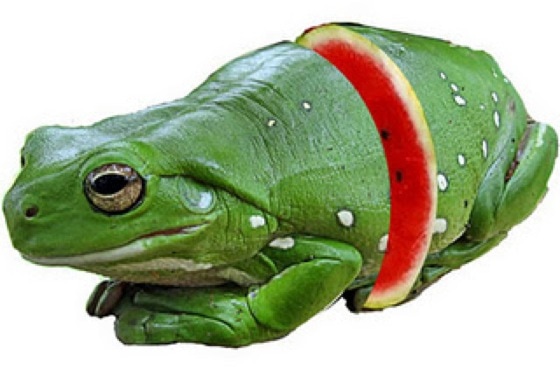
Day One, Something Sliced
You have one class period to create something sliced! What you choose and how you slice it is up to you, however, your best bet is to consider matching shapes, colors, textures and contours carefully.
Day Two, A Super Hero Mashup with Disney
Combine any Disney or Pixar character with the super powers you just know he/she deserves. You pick the character and the power. Be creative and have fun!
Day Three, A Funny Movie Poster Parody
Make a movie poster for a “different” kind of movie. How is it different? That’s up to you. Be creative. Be clever!
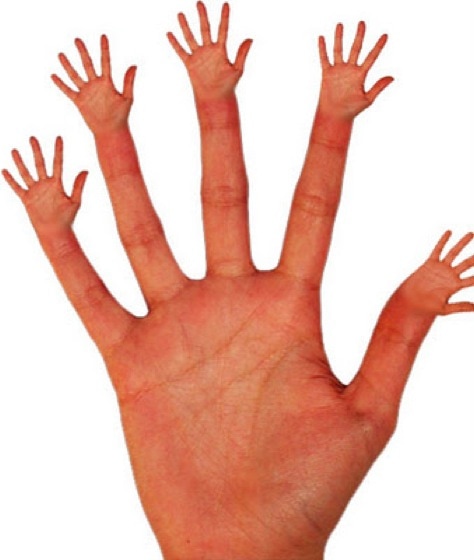
Day Four, Some Scrambled Bodies Looking All Crazy!
This body part might not go here and that part might not go there. Mix up some body parts.
This body part might not go here and that part might not go there. Mix up some body parts.
Day Five, Show Something in Motion
By using the right object and just enough blur you can make sure your object in motion will tend to stay in motion.
Day Six, Really Scary Signs!
Show us the signs we do not want to see.
Day Seven, Normal Extremes!
Take something everyday, common, normal and make it extreme! What about kitty chow for velociraptors? What if the five day forecast was Monday: asteroids. Tuesday: nuclear destruction?
Day Eight, Literal Interpretations!
Pick five compound words and create 5 images that depict literal interpretations.What would a fly look like if it were on fire? Firefly. What would the moon look like if it were made of honey? Honeymoon.
Day Nine, What’s in the Bad Mail?
There’s a bumpy package on the doorstep with a lion’s tail hanging out the back. There’s something very wrong with that envelope. We just got a letter, the worst letter you can possibly imagine. Show us the bad mail!
Day Ten, An Inanimate Object Brought to Life!
Used your photo manipulation skills to bring an inanimate object to life like a tree or a fork.
Day Eleven, Turn a Pop Icon into a Sculpture!
Pop icons range from toys like Barbie to singers like Ke$ha. McDonald’s French fries might even be considered a pop icon. Sculptures range from ancient ruins like Easter Island to modern day artists like Calder or Segal. Both the pop icon and the sculpture should be easily recognized by your audience.
26 The Entrepreneur In you
Bring in a non-perishable food product (can, bottle, box). Create a spoof of the product and replace it's front label (for example, Raisin Brain Cereal instead of Raisin Bran Cereal). After the project has been printed in color, attach it to your food product and give it to Mr. Hunter for grading rather than putting the image into the dropbox). Do a PhotoShop Reflective Journal upon completion of this project.
Depending on their skill set, I think it would be interesting and fun to have them do photo manipulations and enhancements. Have them make a magazine cover with a picture you supply to them of a moderate looking woman/man with bags under their eyes, wrinkles, and whatnot and have them bring it up to magazine status while also creating a cover to go along with it.
used to go to my old high school once a year to teach kids about Photoshop. Since I'd done a bunch of movie posters in LA, I would show them samples of good ones & bad ones and how a story is being told in a good movie poster. They were then instructed to come up with a movie poster for their own fake movie. They had to have a title treatment on it, and they had to do a nice layout. The students then discussed each poster and would see if people could figure out what the movie was about (who the good/bad guys were, where it took place, who the star is, what kind of movie it was). So on top of the basic Photoshop art skills they also had to think on a lot of other dimensions too. They seemed to really enjoy it. (It also gave us an opportunity to talk to kids about how much actors are photoshopped. Like the real fishstick Gwyneth vs. unreal curvaceous Gwyneth.)
http://staff.4j.lane.edu/~eagen/gd1/mutant/gd1_mutant_project.html
Mutant head
The overall concept is to use your ninja-like Photoshop skills to mess with your own head. Your goal is to generally keep it within the realm of believability. You want to fool the eye. You want the viewer to wonder how you did it because your Photoshop skills are so good that they are nearly invisible.
Use a wide variety of skills show below. Combine skills and techniques. I'm not requiring a certain amount of skills per attempt...but for those of you who like to count, then be sure that you don't turn in anything with less than 3 techniques/tweaks/skills.
You will be working on these for 3 full class periods. Don't get hung up on a minimum number of mutants. Rather, work hard for 3 class periods, get creative, and in the end, you'll select your best 2 mutations.
This is called the Guillotine project because you will completely cut the heads off of 2 other people. You will perform 2 bloodless head transplants. One surgery will involve smooth skin-to-skin blend of your neck directly onto someone else's. The other surgery will involve placing your head & neck into someone else's shirt & collar. You'll use a "sandwich layering" technique for the second surgery. The finished images will look freaky but believable because of your Photoshop skills and attention to detail.
Work on the skin-to-skin surgery first. Many of the skills from this will transfer to the sandwich layering surgery. You will be working on these for 2 full class periods (1 class period per surgery).
Work on the skin-to-skin surgery first. Many of the skills from this will transfer to the sandwich layering surgery. You will be working on these for 2 full class periods (1 class period per surgery).
Composites
http://staff.4j.lane.edu/~eagen/gd1/gd1_photoshop_composite.html
Project 1 - Defiling Classic Artwork
What would it look like if you used your Photoshop skills to simultaneously defile some of the most world's most iconic artwork AND perpetuate some stereotypes?
1. Click on one of these famous pieces of art and download the full sized image.
Mona LisaAmerican GothicDavidCreation of Adam
The ScreamWhistler's MotherChristina's WorldFrida Kahlo Portrait
Freedom From WantThe ThinkerMigrant MotherLa Grande Jatte
Old GuitaristThe BathLe DemoisellesOath of Horatii2. Then choose a stereotype from this list: caveman, jock, nerd, yuppie, cougar, billionaire, surfer, celebrity, hobo, diva, goth, trucker, redneck, emo, college professor, metal head, gamer, hippie, lumberjack, mad scientist, zombie, Duck fan!
3. Use the interwebs, Googlenets, and netwebs to search for imagery to turn a masterpiece into a a stereotype. You'll use the Photoshop skills that you've learned to create a composite image.
4. Save a copy of your file as a TIFF (no layers). Place the TIFF, enter your name & period, and print. Boom goes the dynamite!
NOTE: It's all in good fun. There's no intent to offend or make any political or moral statement. It's simply a fun way to practice composite imaging in Photoshop
Puns
http://www.incredibleart.org/lessons/high/puns.htm
http://www.incredibleart.org/lessons/high/puns.htm
Final Project - Promotional Flyerhttp://staff.4j.lane.edu/~eagen/gd1/gd1_final_project_flyer.html
This final project will pull together everything that we've studied during the term. Your task is to design a promotional flyer that relates to the fictitious band, restaurant, or clothing store/brand that you created during the first half of the term. Here are some possibilities:
Band - concert, tour schedule, new album release, in-store signing, crowdfunding campaign, fan club, festival, documentary film, battle of the bands, charity drum-off, memorial service for drummer who died in a tragic on-stage spontaneous combustion incident, etc.
Restaurant - grand opening, new menu item, taco tuesdays, appetizer menu, kids menu, ladies night, holiday tie-in event (Cinco de Mayo), jazz night, etc.
Clothing - year end sale, coupon, seasonal clothing, new location, fashion show, sponsor charity event, coat drive, new fabric promotion, etc.
The promotional flyer will include:
- original logo (from 1st half of class)
- photo manipulation (multi-layered, edited)
- informational hierarchy
- wise font choice - readability
- bleed and safety zone
- breathing room
- visual alignment
- process documentation
http://www.mchsdigitalmedia.com/teachers-resources.html
Great videos from Russell Brown
https://vimeo.com/user6594224
http://www.designcrowd.com/community/
https://phlearn.com/9-cool-photoshop-tutorials-beginner-advanced
https://www.theartofed.com/lesson-plans/
http://tinaavalon.k12.mo.us/Assign_Final_Website/multi-media/sr_photoshop.html
http://www.photoshopessentials.com/photo-effects/selective-coloring/
https://lessonplans.btskinner.com/dtp.html
https://www.lessonplanet.com/lesson-plans/photoshop/all
http://www.digitalwish.com/dw/digitalwish/view_lesson_plans?keyword=photoshop
*Super Hero Tutorial -
http://www.digitalartsonline.co.uk/tutorial/photoshop/create-glowing-superhero/
http://www.mchsdigitalmedia.com/teachers-resources.html
http://www.lee.k12.nc.us/Page/8915
Option: turn day into night:
http://www.creativebloq.com/photoshop/turn-day-night-colour-shifted-exposure-1137630
Photoshop lessons are everywhere on line for free. Below, you’ll find some fantastic project tutorials. Pick at least one of these that interest you. When you finish your project, include the link, so I can compare your results.
PHOTOSHOP LESSONS….
http://www.photoshopessentials.com/photo-effects/photo-strips/
http://www.photoshopessentials.com/photo-effects/light-streaks/
http://psd.tutsplus.com/tutorials/text-effects-tutorials/create-a-spectacular-grass-text-effect-in-photoshop/
http://www.webdesignbooth.com/40-really-useful-photoshop-text-effect-tutorials/
http://www.melissaclifton.com/tutorial-pentool.html
http://www.photoshopsupport.com/photoshop-cs3/pen-tool-tutorial/index.html
http://www.dphotojournal.com/photoshop-tutorial-creating-a-zombie/
http://www.noupe.com/tutorial/53-killer-photoshop-illustrator-effects-and-tutorials.html
http://www.secondpicture.com/tutorials/digital_image_processing/light_and_glow_effect_in_photoshop.html
http://www.webdesignerdepot.com/2009/03/20-beautiful-photoshop-montage-tutorials/http://www.smashingapps.com/2009/04/01/40-must-see-resources-and-inspirational-collections-for-designers-to-discover-the-best-of-the-web-in-march.html
http://blogof.francescomugnai.com/2008/12/how-to-create-a-real-3d-glass-ball-in-photoshop-cs4/
http://www.smashingapps.com/2009/05/05/50-truly-useful-photoshop-tutorials-for-amazing-photo-effects.html
http://psd.tutsplus.com/tutorials/tutorials-effects/the-making-of-constant-slip/
http://psd.tutsplus.com/tutorials/tutorials-effects/create-a-magic-crystal-ball/
http://psd.tutsplus.com/tutorials/photo-effects-tutorials/how-to-create-a-severed-arm-in-photoshop/
http://psd.tutsplus.com/tutorials/icon-design/creating-a-set-of-digital-painting-icons-part-2-camera-icon/
http://dzineblog.com/2008/09/27-best-photoshop-gadget-design-tutorials-to-design-realistic-gadgets.html
http://psdtuts.com/tutorials/designing-tutorials/make-an-inspiring-artistic-poster-with-drawn-elements/
http://psdfan.com/inspiration/graphic-design/20-super-professional-photoshop-light-effects-tutorials/