Digital Scratch Art
Pre-Activity: Traditional Scratch Art
- Check out the 2018 Gallery of non-digital scratch art
Overview of Assignment:
- Your task is to use Photoshop to create several pieces of digital scratch art
- How many pieces: (Minimum of 1 for each of the methods outlined later in this document)
- It is more about quality, not quantity
- Some students will rush and need to make quite a few
- Other students will take their time and be able to create one or two "masterpieces" that wow us all
- Demonstrate
- In your pieces, you will be evaluated in terms of:
- Effort and creativity
- Evidence of exploration
- Variety of scratch techniques used (achieved via different brushes).
- Every thing doesn't need to be solid blocks of black or colour
- Scratch marks can create texture and interest
- Variety of images created
- Do not rely solely on stencils (text or custom shapes)
- Do not do the same thing over and over and over
- Must be evidence of attempt to draw free hand (or at the least to trace)
- Post your finished work in a new page on your portfolio site for this course.
- In Photoshop:
- This is probably already done, but if not, save your finished work as a .psd or .tiff
- Export as a jpeg or png
- Go to File > Save As > .... (and choose the option). For jpeg set at highest settings.
- In Weebly Portfolio:
- Post the finished picture as a jpeg or png file.
- Upload the actual psd or tiff file so that it can be downloaded by the viewer and layers can be evaluated.
- For larger files, you may need to post into your google drive or equivalent and then provide a link and access to the file.
- For the Method 3 Photo (Scratching of Photograph) be sure to post the original image and the final image.
- Be sure to give each piece a proper title or name
- Be sure to download and include your non-digital scratch art on your portfolio page
- In Photoshop:
Method 1: Erasing Method
- Open Photoshop and create a new file: 8" X 10" or 10" X 8" at a resolution of 150dpi in RGB
- Save file as yourname_scratchart
- Possibilities for colourful base layer
- Find a colourful (rainbow/swirled) background from google (look for really large images)
- Open it up in Photoshop, drag into the new file you created and resize as necessary to fill the entire canvas
- Create a layer using the gradient tool (consider customizing your gradient)
- Colour your base layer using paint brush
- Find a colourful (rainbow/swirled) background from google (look for really large images)
- Create a new layer, and use the paint bucket to fill it with black
- Use the eraser tool and draw your design
- Be sure to use a hard or solid brush.
- Resize the brush using the square brackets [ or ]
- Experiment with drawing free hand or using stencils (marquee tools) or shapes to control your drawing.
- Horizontal type mask tool or create shape and then load selection
- If using custom shape tool, you have two options:
- Have the option (1st drop down) set to shape.
- Create your shape
- command click the thumbnail in the layers palette to load the shape (dotted marquee)
- turn off the layer, and go to your black layer and start erasing within the shape.
- if you want to erase outside the shape, then inverse the selection by either going Command Shift I or by going to the "Select" menu and choosing inverse from the options.
- Easier: have the option (1st drop down) set to path
- Create your shape
- Then by the "Make" label, press the "Selection" button. Then press OK.
- Have the option (1st drop down) set to shape.
- If you make a mistake, switch to the brush (B) and paint black over the mistake, then switch back to the eraser tool (E)
- If using a tablet, try clicking on the air brush tool so that the brush is pressure sensitive
Method 2: Masking Method
- Create your colour and black layers as we did in the previous method
- With the black layer selected, click on the mask button at the bottom of the layers palette (button that has a white rectangle with a circle cut out)
- Use the brush tool and paint your design on and off by switching between black and white as your foreground colour (use X key to switch)
- The important thing is to do your painting on the mask, not the layer itself
- The corner markers should be around the mask, not around the layer thumbnail
- The corner markers should be around the mask, not around the layer thumbnail
Masking / Keyboard Shortcuts:
[ or ] will resize the brush
Shift with [ or ] will adjust the hardness of the brush
X will toggle between foreground and background color (black and white)
D will restore the default colors (black and white)
Shift and click on layer mask will toggle layer mask on and off
Alt (option) and click on layer mask will toggle between viewing layer mask and image
Ctrl J will copy via layer
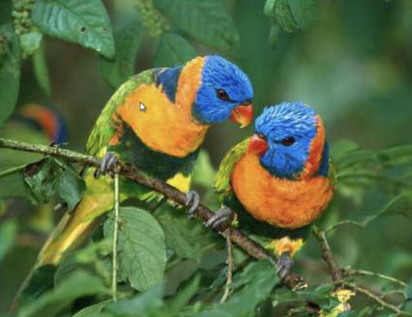
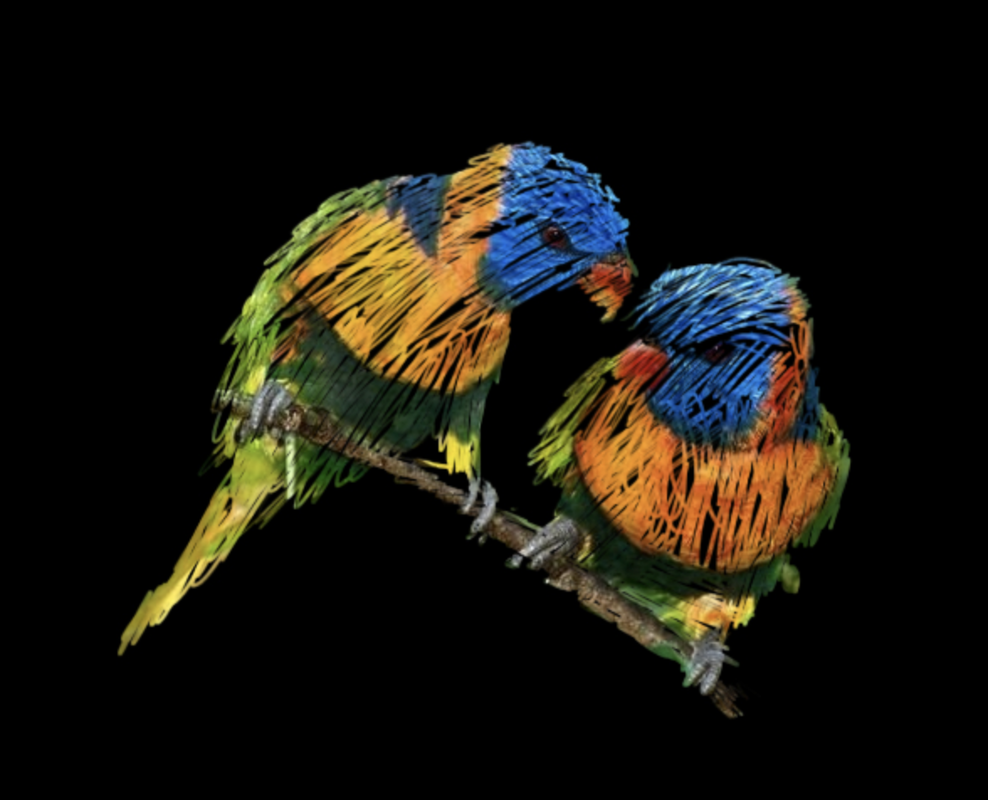
Method 3: Scratch Photo
- Instead of using a colourful background, use a photograph as the base layer
- Open up your photo in Photoshop. Resize as necessary to get a resolution of 150px.
- Create an adjustment layer (Layer > New Adjustment Layer) and apply the posterize filter.
- Set the levels at either 3, 4, or 5.
- We use an adjustment layer so we can change things later.
- Set the levels at either 3, 4, or 5.
- Create black layer but lower opacity so you can also see the picture
- Do your scratch effect using the eraser tool or the masking technique
- Can be useful to rotate the canvas (really simple when using a graphics tablet)
- When you are done (or when you want to check the progress) increase the opacity back to 100% to view the scratched effect
- Open up your photo in Photoshop. Resize as necessary to get a resolution of 150px.
|
|
Hints for Wacom Tablet:
- Make sure the software is installed (can be downloaded from their site)
- Go to mapping so you can fix the proportions so that the tablet will match the size of your monitor. That way when you draw things, they will be in proportion. A lot less frustrating for most artists.
- Can also set up options for your pen (buttons, default pressures)